

I became captivated by this blouse by Maison Margiela (formerly Maison Martin Margiela) from the moment I first saw it. A cotton shirt marked with genuine lipstick prints, which were kissed onto the garment by in house seamstresses - only 7 were made in total. This piece is a romantic dream come true, reminding me of sad romantic poets.
Determined to make my own, first I had to work out how. With a white blouse, if you washed a genuinely kissed garment the red would bleed and feather - ruining the blouse and the lipstick kiss marks! That's when I had the idea to make a stamp based on my own lipstick kisses. Continue reading for how I did it below! Or, if you are more of a video person, watch the video tutorial on Youtube here. If you make this, please let me know, it would make my week! Far from perfect, it's still one of my favorite pieces in my wardrobe.
Moodboard:
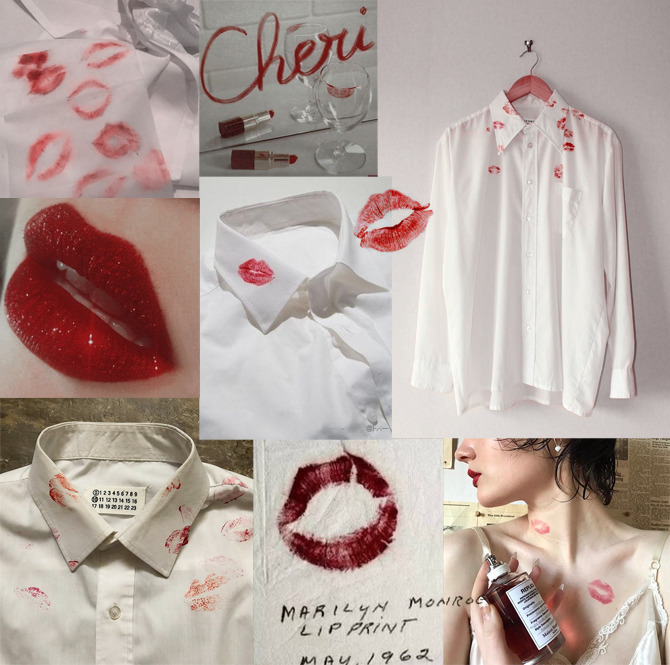
Image Sources
You Will Need:
- White Blouse
- Red Fabric Paint (I used this brand)
- Paint Brush
- Craft Foam
- X-Acto Knife
- An Emollient Lipstick (I used Lipstick Queen Lip Lacquer in Fast Car Coral)

How To:
Step One: Creating the Stamp
While wearing an emollient lipstick, kiss a piece of craft foam to create a lipstick print. The lipstick has to be emollient so the print will transfer from your lips to the foam! * Using an X-Acto knife, start carving out the shape of the lipstick print. Be sure to cut out the middle of the mouth, and lines to replicate the look of real lips. Rinse the real lipstick off the stamp.
* Clarification Note: when I say an "emollient lipstick", I meant that in terms of texture vs. ingredient! Simply put, you just need a red lipstick that isn't super matte and dries down. If you use a matte lipstick and kiss the craft foam, it won't transfer, and you won't be able to use that as a template to carve your stamp with. Use a lipstick that has a very wet and slick formula, so that when you kiss your hand or, in this case, the craft foam, it leaves a very distinct mark.


Step Two: Using the Stamp
Brush red fabric paint onto the stamp in a thin, even layer. Don't dab the paint into the wrinkle lines of the stamp. Practice on a piece of paper and scrap fabric to: 1. get a feel for how applying the paint differently to the stamp looks and 2. how the different amount of pressure to apply as you stamp looks. With that information in mind, carefully use the stamp on your blouse - repeat as desired.


This is so cool! Now I feel like doing my first true DIY. The last one I did was punk-ish fingerless gloves from my grandmother's socks. Lots of safety pins were used! I love seeing DIY projects. Gives me so many ideas!
ReplyDeleteOoh thank you so so much! I really hope you are able to make this, seeing people follow my diys is such an incredible compliment and makes me so happy :') I really want to do more because the pay off is so great!
Delete